Working with Scenes
Blocking Stage
After you’ve completed all the preliminary steps and know exactly what needs to happen in your shot, proceed to planning your animation in Maya.
Ensure that your blocking is done in stepped mode so we can see the timing and spacing of your animation.
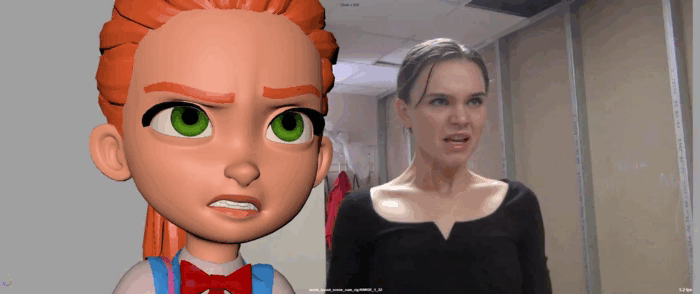
Below is an example of excellent use of video reference during the blocking stage.
You don’t need to replicate the video reference exactly
Enhance the poses, improve the acting, and let the animation be animation—don’t do rotoscoping
Only after your blocking is approved, move on to the next stage.
Blocking+
Here, you refine your animation while still working in stepped mode. Some finer movements can be implemented in spline mode if you need to showcase nuances.
At this stage, you should show all the highlights and details of your upcoming animation. Once this stage is approved, you can move on to splining.
(On a serial project, you can combine this stage with the previous one)
Spline
This is the transition stage between blocking and polishing your animation. You will mostly work in the Graph Editor to smooth out your animation.

Polish
Finally, it’s time to finalize your animation.
Now, you should work on arcs, improve your spacing, and fine-tune other technical aspects to make your animation as appealing as possible. At this stage, you can use minor facial controls to fine-tune facial animation. (On a serial project, you can combine this stage with the previous one!)
Playblasts and Reviews
Color correction for the playblast
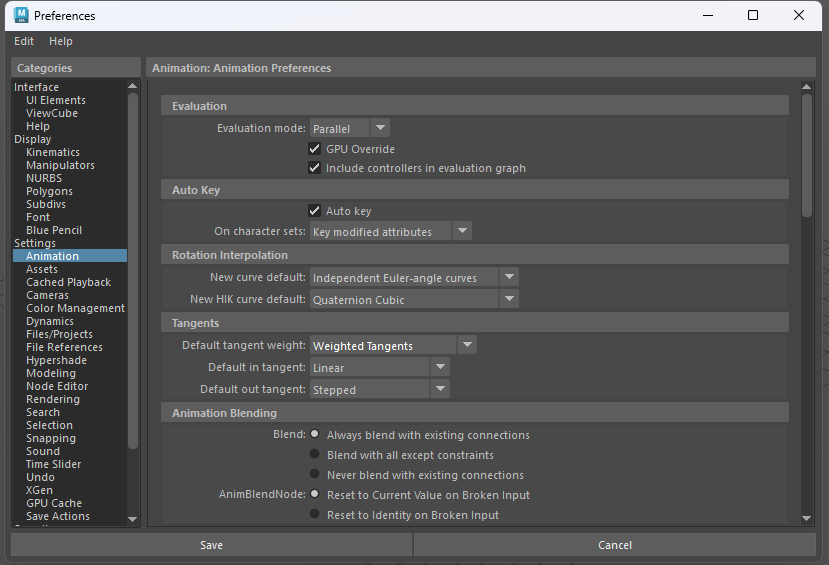
- Open
Preferences
- Select
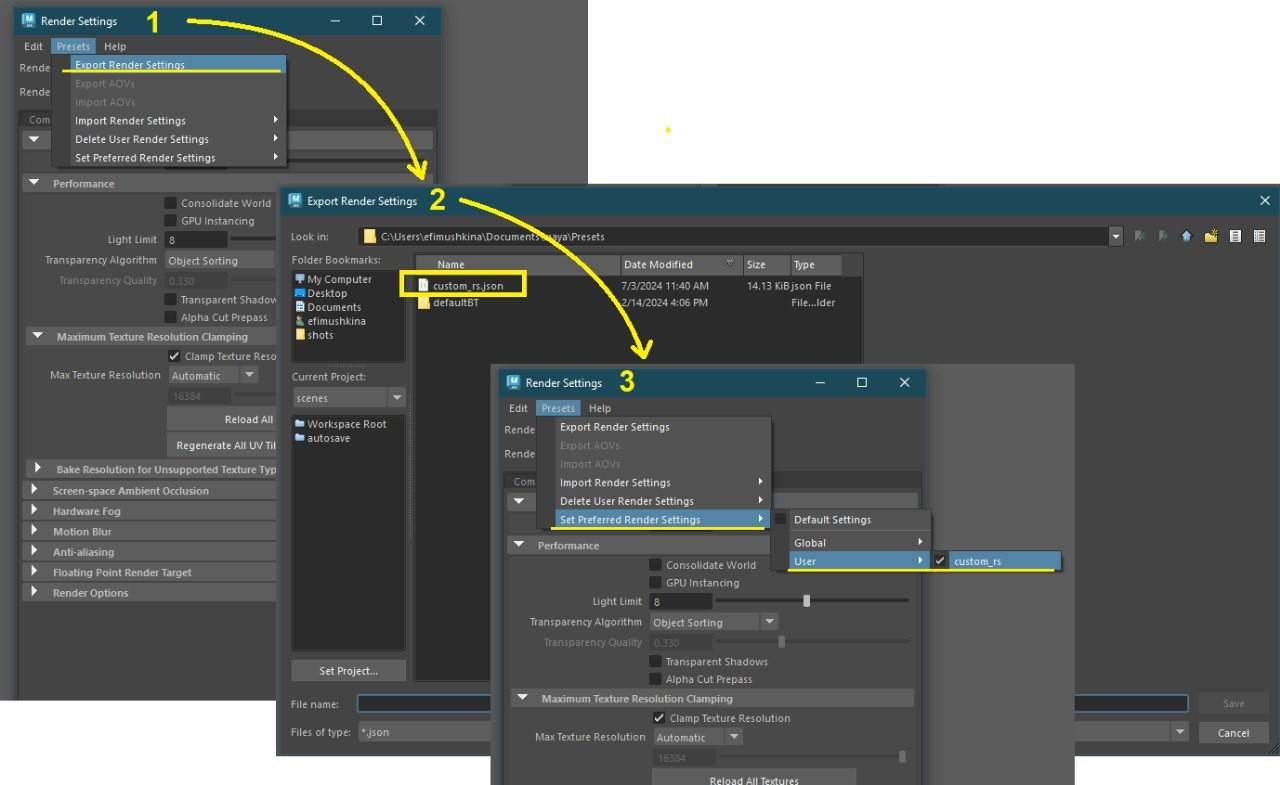
Color Managementand inOCIO Config Pathenter<MAYA_RESOURCES>/OCIO-configs/Maya-legacy/config.ocio. - In
Render Settings, setLight Intensity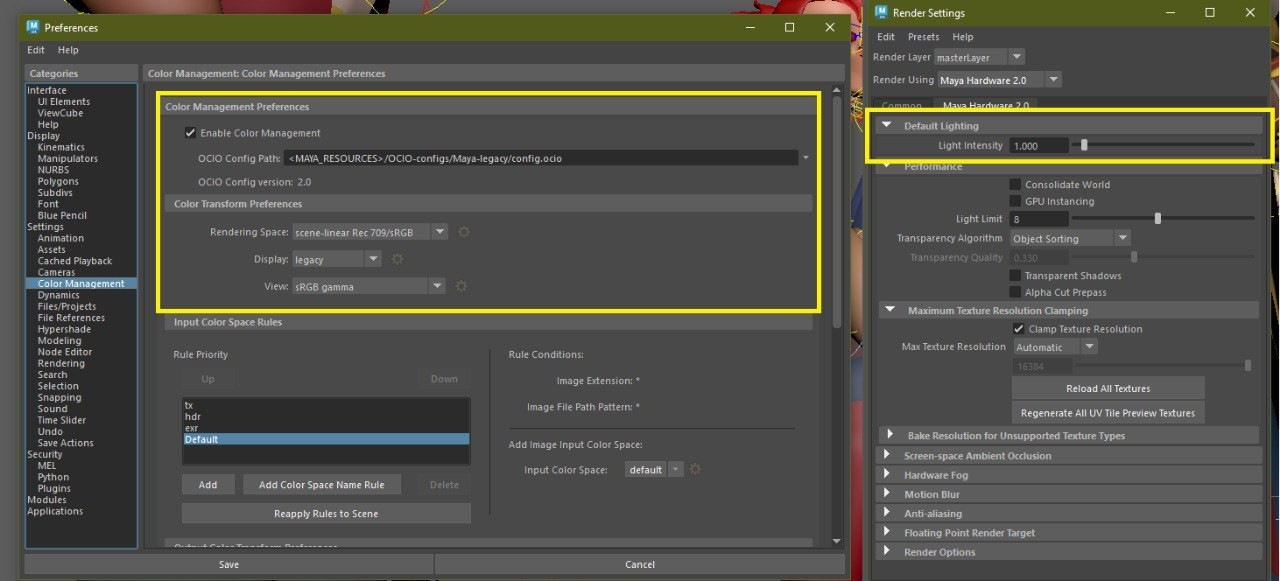
- Save these settings for future use.
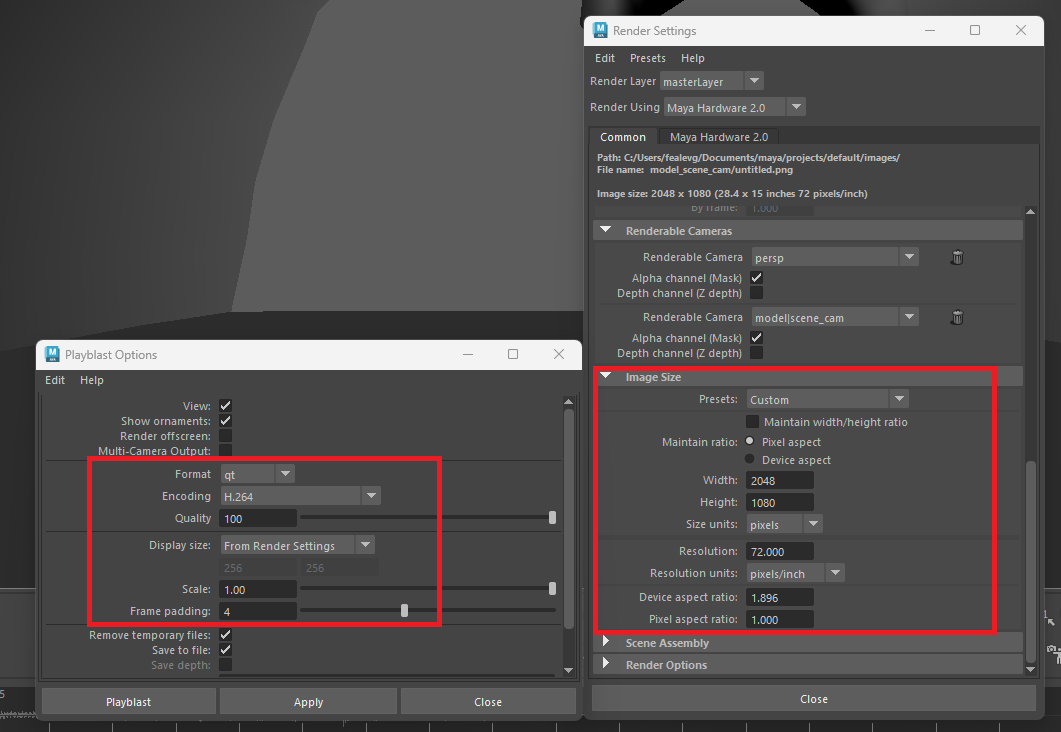
What should your playblast settings be?
How to upload a new version of the playblast for review?
- Open your
My taskspage in Prodtrack and click on the task name. - Open the
Versionstab. - Click
Add Version. - Select the necessary file, change its status to
review. You can also add a brief description of the changes made in this version.
Ensure that you correctly select the scene for which you are uploading the playblast, and that the task field reads "animation_freelance." Otherwise, you might upload the playblast incorrectly, and it won’t appear for review.
- Click
Create.

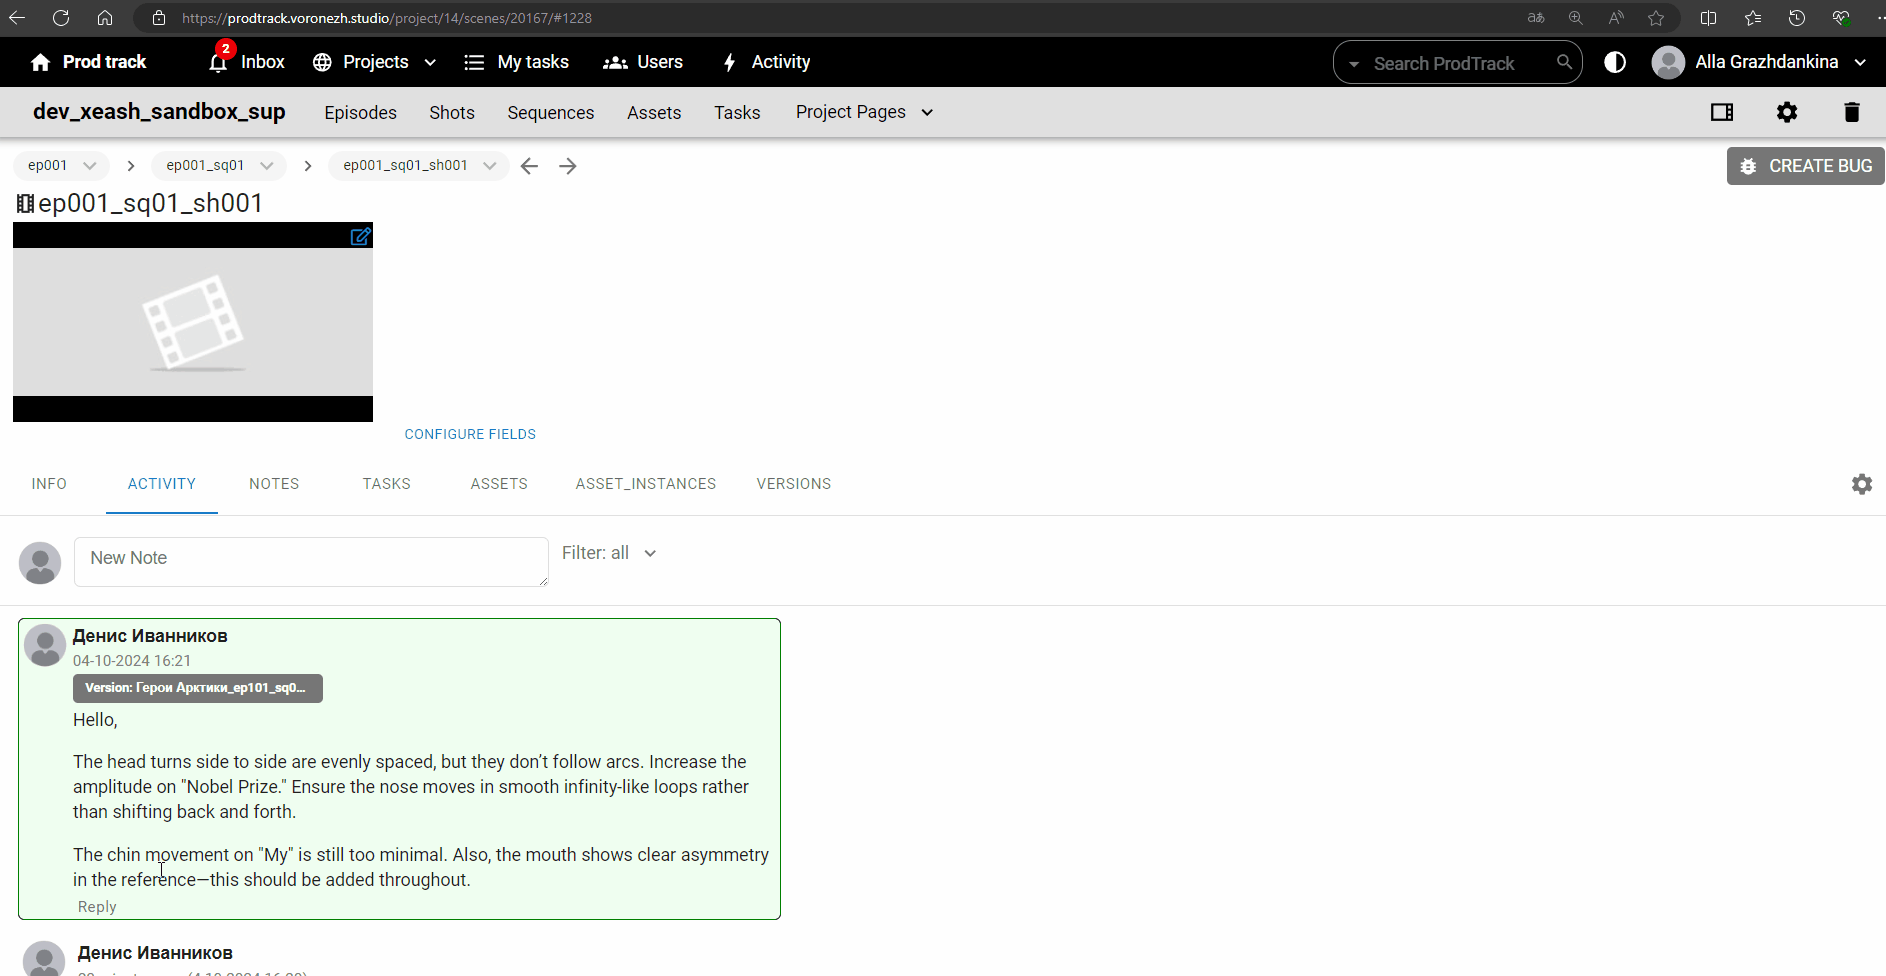
When and where will feedback on your work appear?
- We strive to provide feedback as quickly as possible. You’ll receive comments via email either the next day or the day after you upload your latest playblast version for review. Comments will also be visible in the Activity and Notes tabs and within the version itself. The playblast status will change to
Comment.

- If you have questions about the comments, you can reply to them using the
Replybutton. If there are no questions, fix the issues and upload a new version of the playblast for review.